
The kitchen smelled of flour, sizzling bacon, and nostalgia. I was a little girl, standing on a stool to reach the counter, watching my Ukrainian grandmother roll dough with a precision that felt almost sacred. Her hands moved quickly but gently, folding the dough over dollops of potato filling, crimping the edges with practiced ease. I didn’t know it then, but those moments were laying the foundation for a tradition I’d carry with me for life.
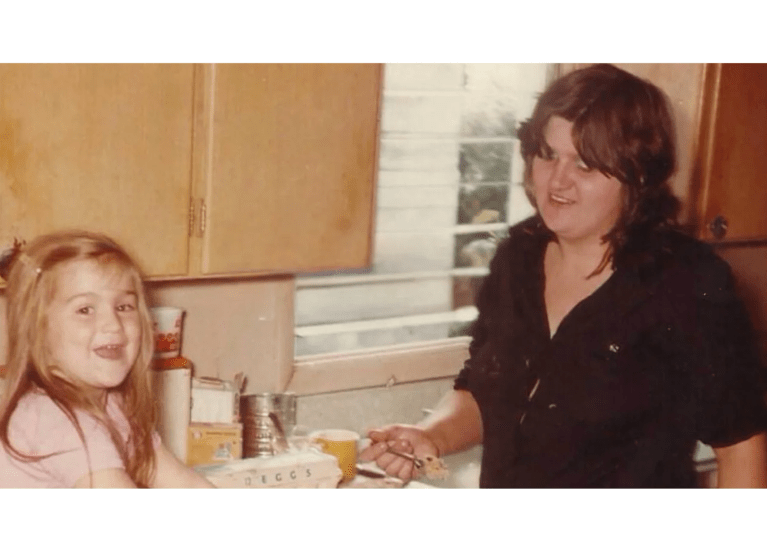
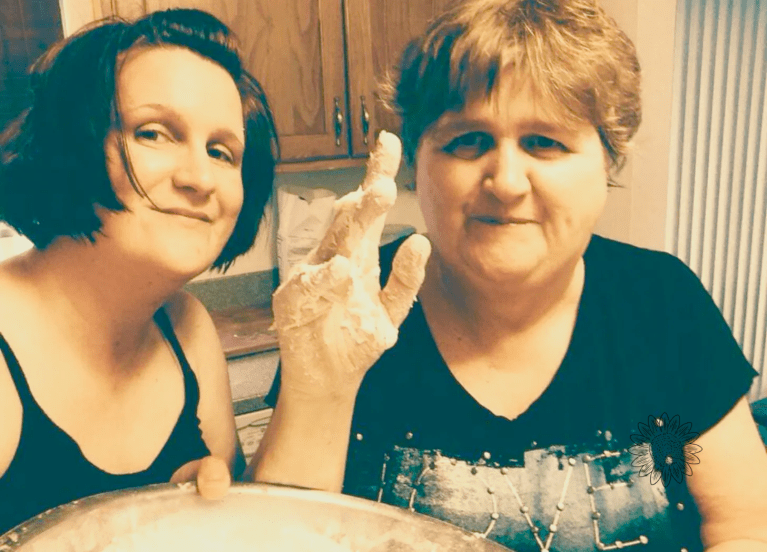
When my grandmother passed, it was my childhood family that carried on the tradition. My dad, ever the guardian of family rituals, ensured that pierogi still graced our table. But it was my mom and I in the kitchen who created them, rolling, filling, and sealing each one with care. After my dad passed, the tradition became less frequent, happening only once or twice a year, at Christmas and on my birthday, when the longing for connection was strongest.
When my husband and I moved out of state, the tradition adapted again. With a smaller household and a much smaller kitchen, the process changed. We began making pierogi together, adjusting the recipe and the workflow to fit our new life. No more 250+ pierogi marathons; now we make around 70 (two batches), enough for two dinners, a breakfast, and a few precious extras to freeze.
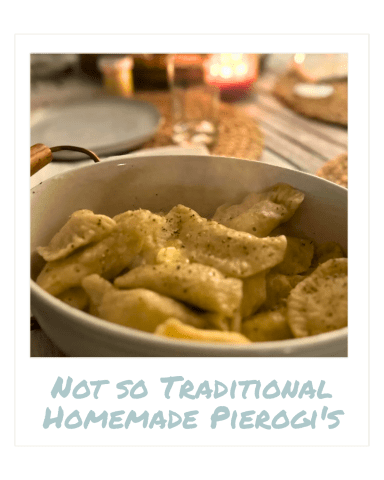
Homemade Pierogi’s
What You Will Need:
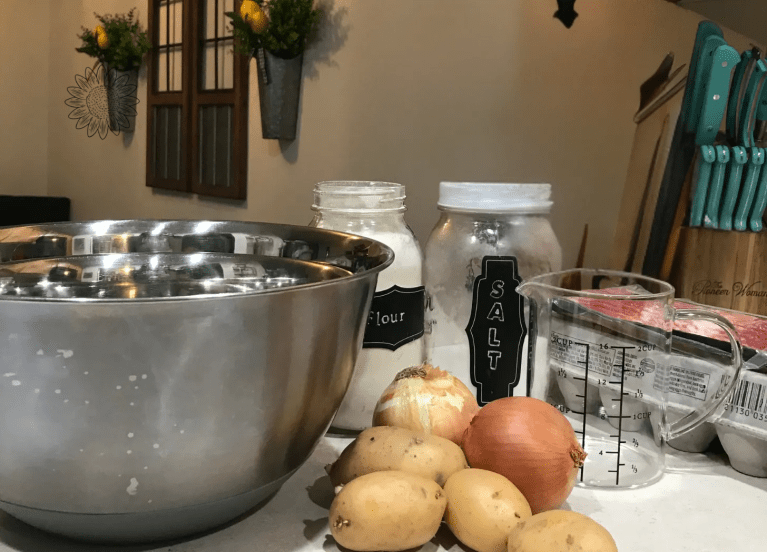
Dough
- 3 1/2 cups all-purpose flour + work surface
- 1/2 teaspoon salt
- 1/4 cup sour cream + serving ( I prefer Lucerne brand)
- 1 egg
- 1 cup room temperature water
Filling
- 1 1/2 lb gold potatoes, peeled and quartered
- 4 cups water
- 1 teaspoon sea salt
- 1/2 lb chopped bacon
- 1 sweet onion, diced
- 1/2 stick butter + cooking and storage prep

Tools You Will Use:
- KitchenAid mixer with dough hook
- Measuring Cup
- 4 Pc Measuring Cup
- Instant Pot
- Large cast iron skillet
- Large mixing bowl
- Round cutter (approximately 3 inches in diameter)
- Rolling pin
- Beeswax wrap
- Flour sack towel
- Slotted spoon or tongs
- Large pot for boiling pierogi
- Casserole dish with lid
What You Will Need To Do:
Dough
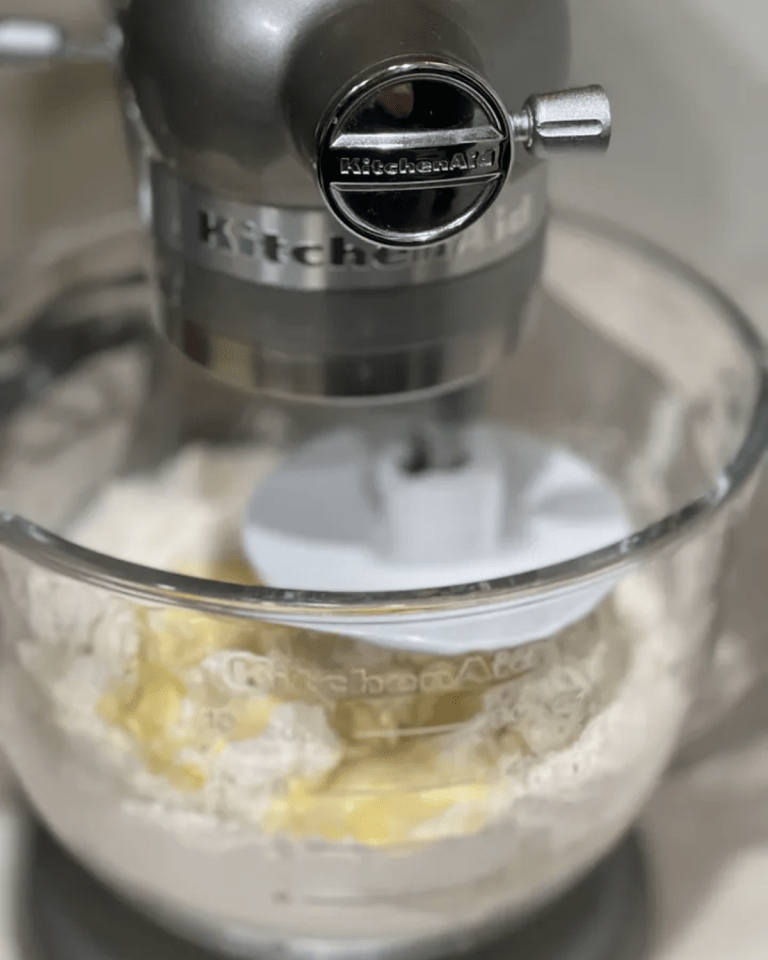
- In a KitchenAid mixer fitted with a dough hook, combine 3 1/2 cups flour, 1/2 tsp salt, 1/4 cup sour cream, an egg, and a cup water at room temp. Mix on low speed until the dough comes together.
- Adjust consistency as needed. If the dough feels dry, add water a tablespoon at a time. If it’s sticky, gradually incorporate more flour.
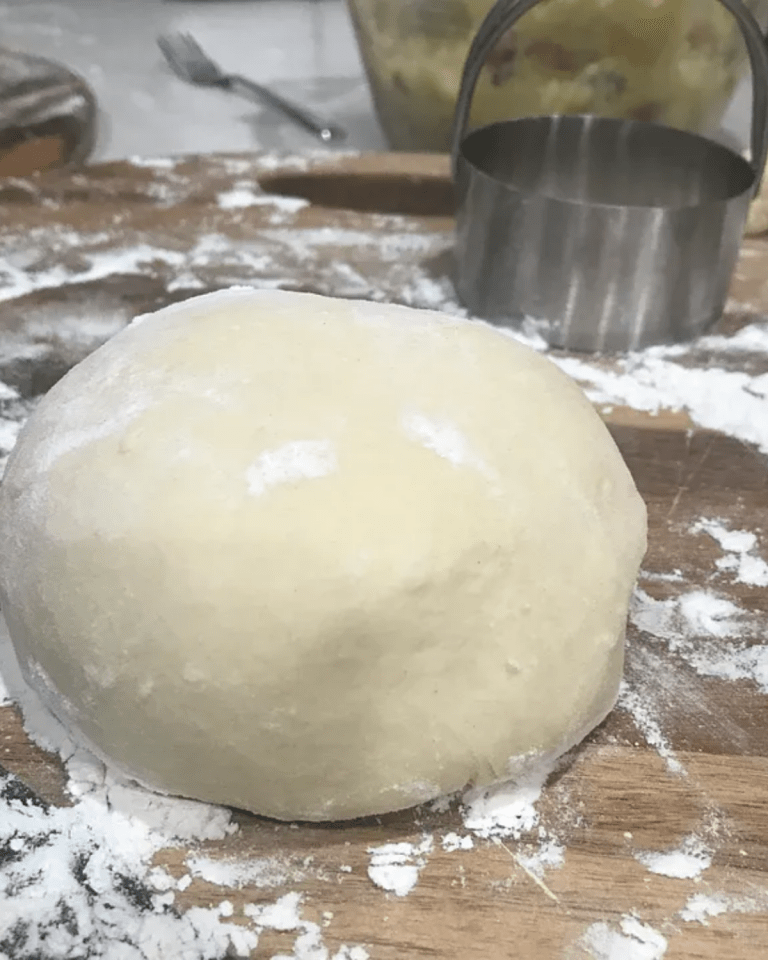
- Once combined, increase the speed slightly and knead the dough in the mixer for 3 to 4 minutes until it becomes elastic.
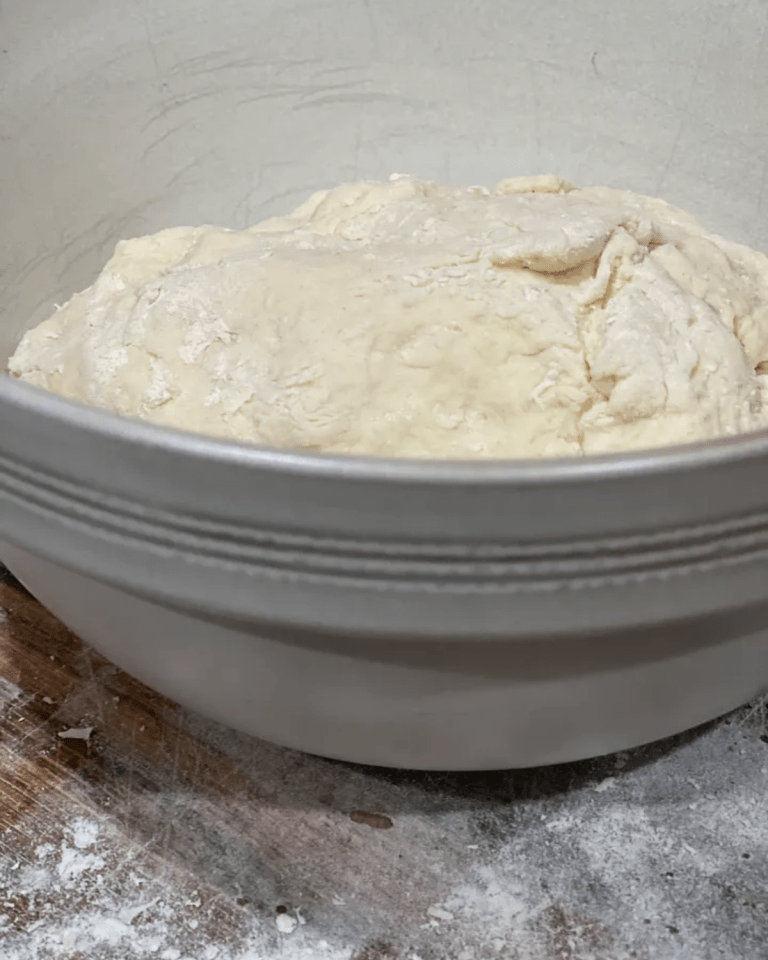
- Cover bowl with a beeswax wrap and flour sack kitchen towel, and refrigerate for at least 30 minutes.
While the dough is chilling, make the filling. (yeah, I know it … I am a poet)
Filling
- Place 1 1/2 lbs. of peeled and quartered gold potatoes in an Instant Pot with 4 cups of water and 1 tsp sea salt.
- Secure the lid and Pressure Cook on High for 12 minutes.
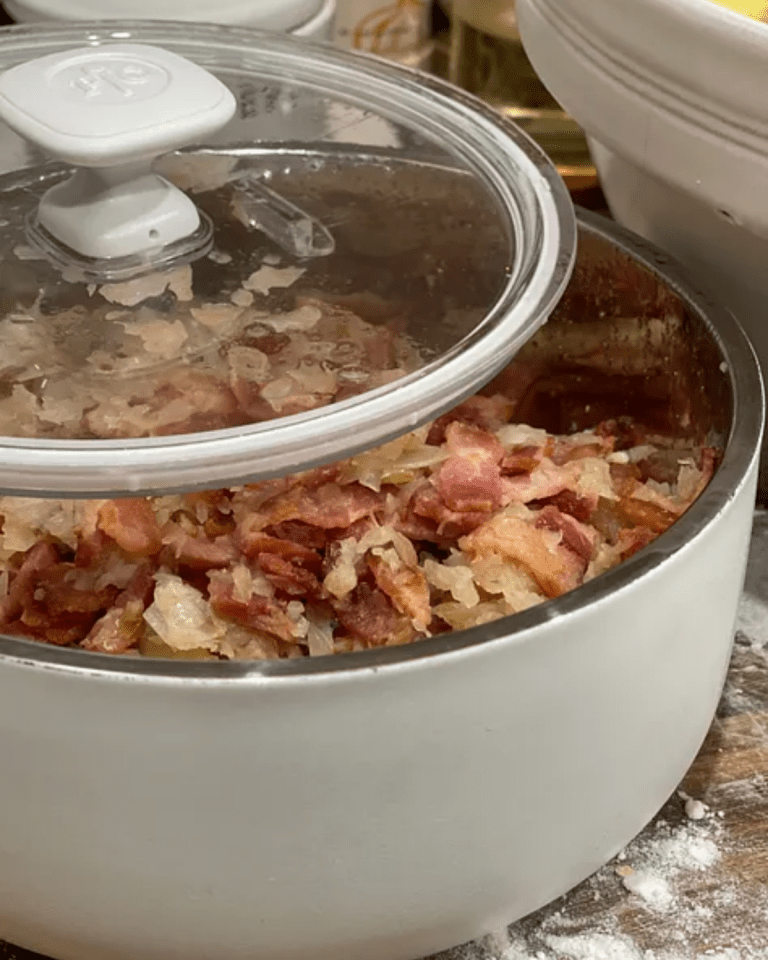
While the potatoes cook, make the bacon and then sauté the onions. - Cook the 1/2 lb. chopped bacon in a large cast iron skillet until lightly crisped. Set aside on paper towels to drain.
- Add butter to the cast iron skillet and sauté the diced sweet onion. Use half of the sautéed onions in the filling and reserve the other half in a warmer for serving.
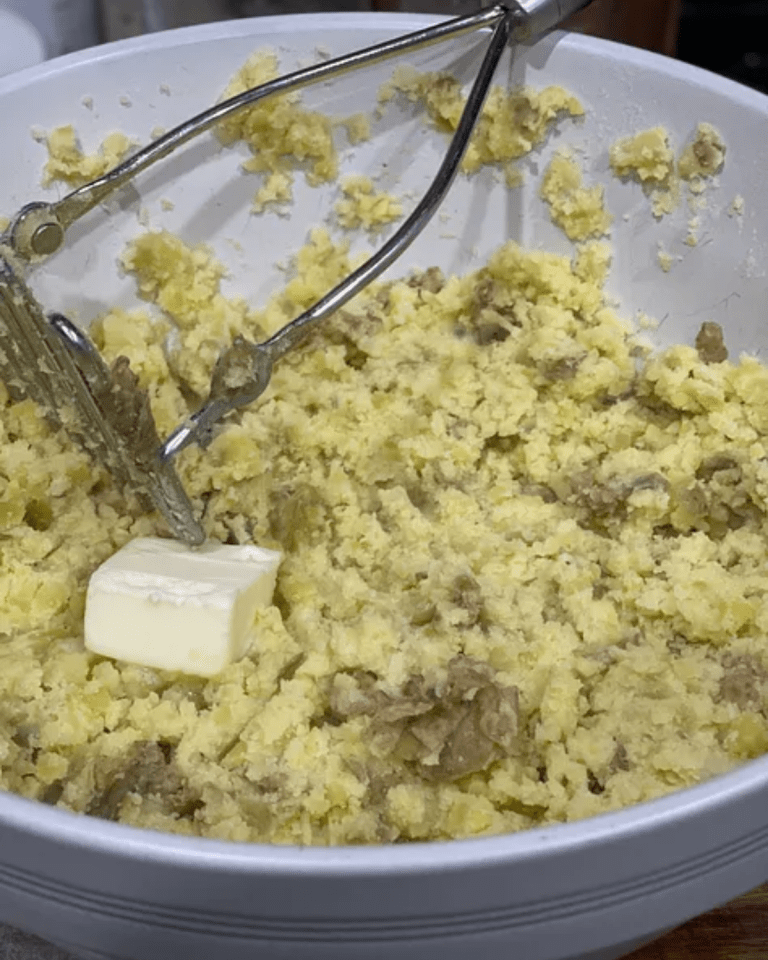
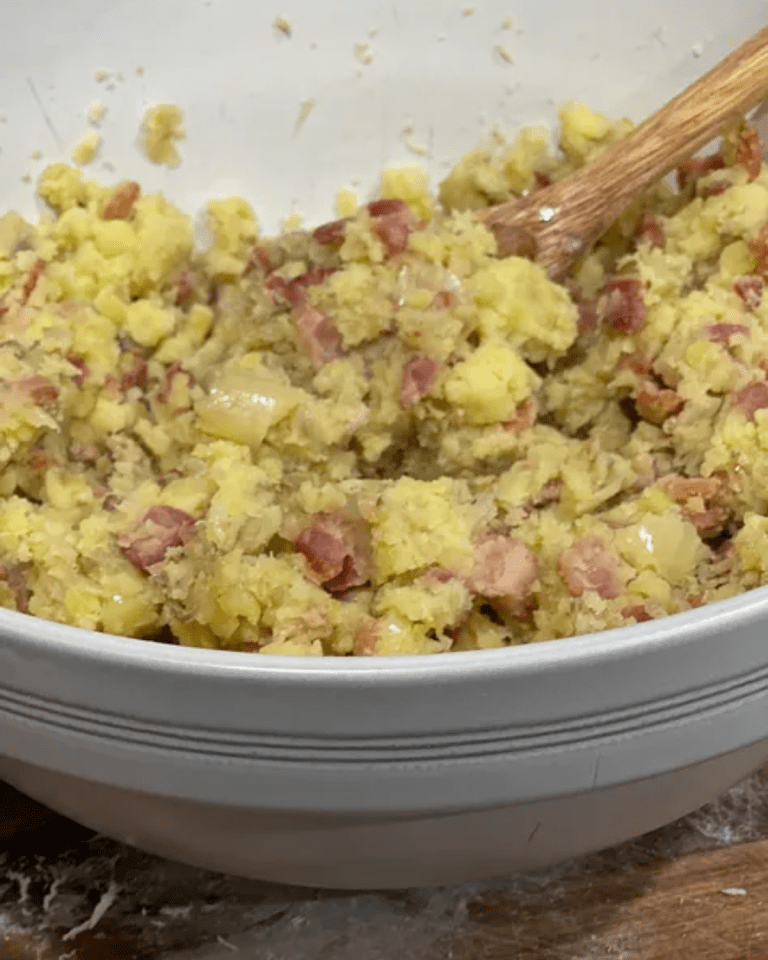
When potatoes are done, quick release the pressure and drain the potatoes. Set aside until bacon & onions are ready. - Lightly mash the potatoes into a large mixing bowl – lumps are our friends.
- Add the lightly crisped bacon, half of the sautéed onions, and half a stick of butter to the lumpy mashed potatoes. Lightly stir to combine filling.
The Pierogi Process
Assemble the Pierogi
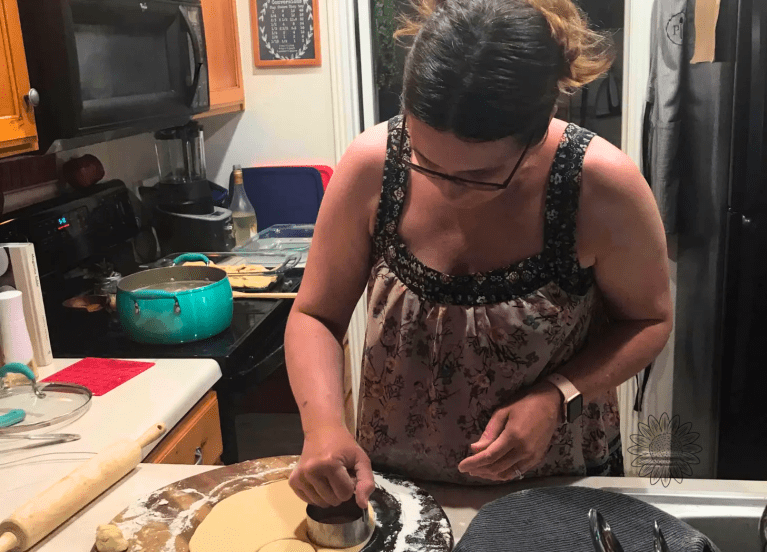
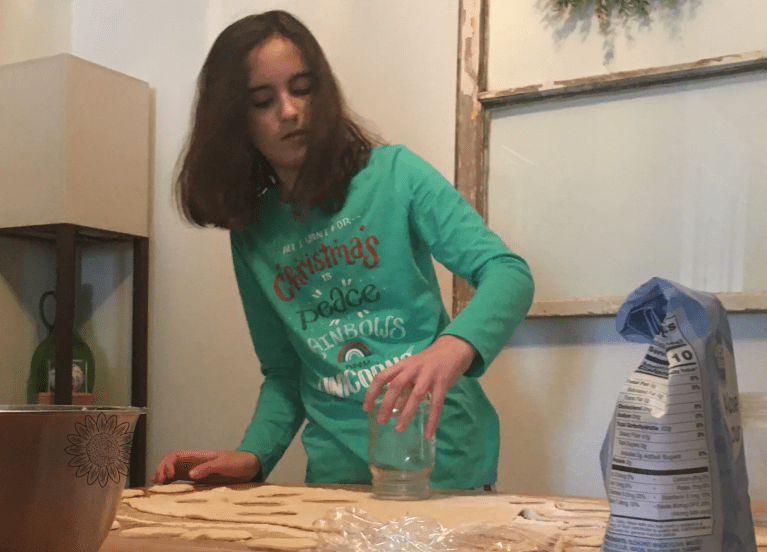
Roll the chilled dough on a floured surface until thin and even. Add flour if it is sticky.

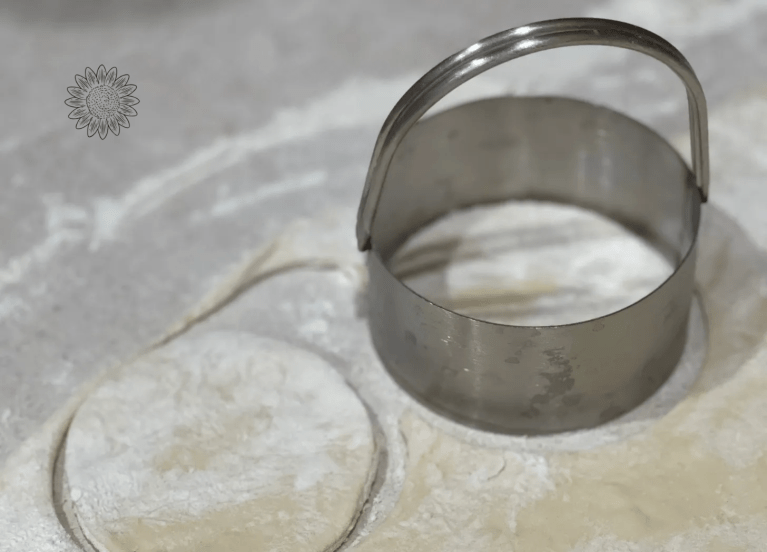
Use a round cutter (approximately 3 inches in diameter) to cut out circles from the dough.
Place a spoonful of filling in the center of each circle.
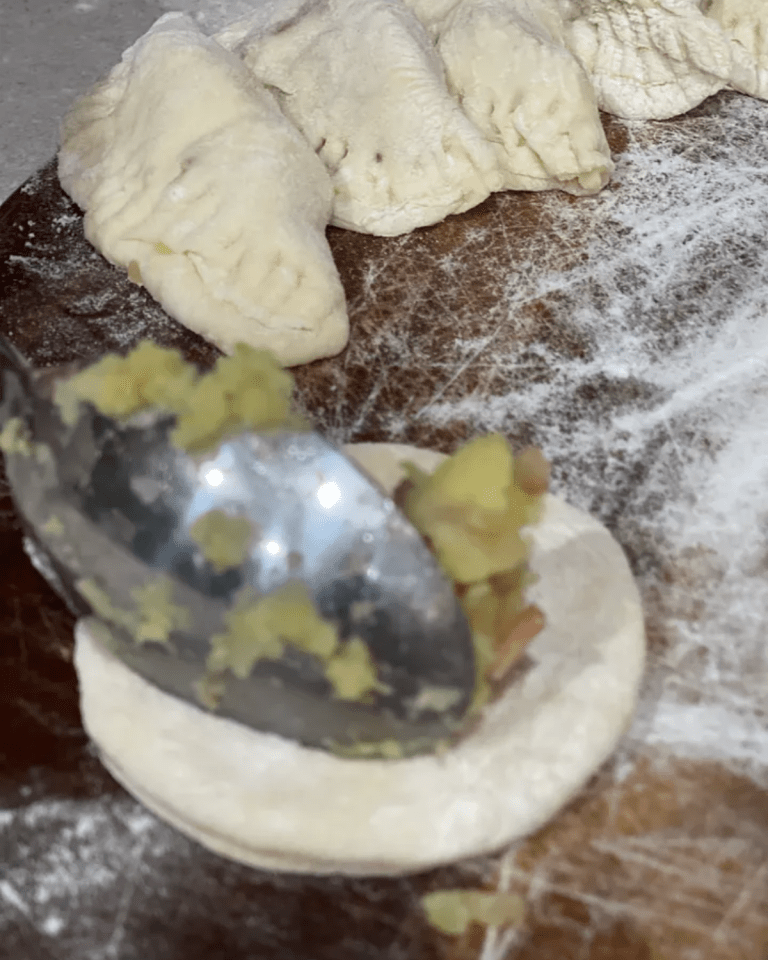
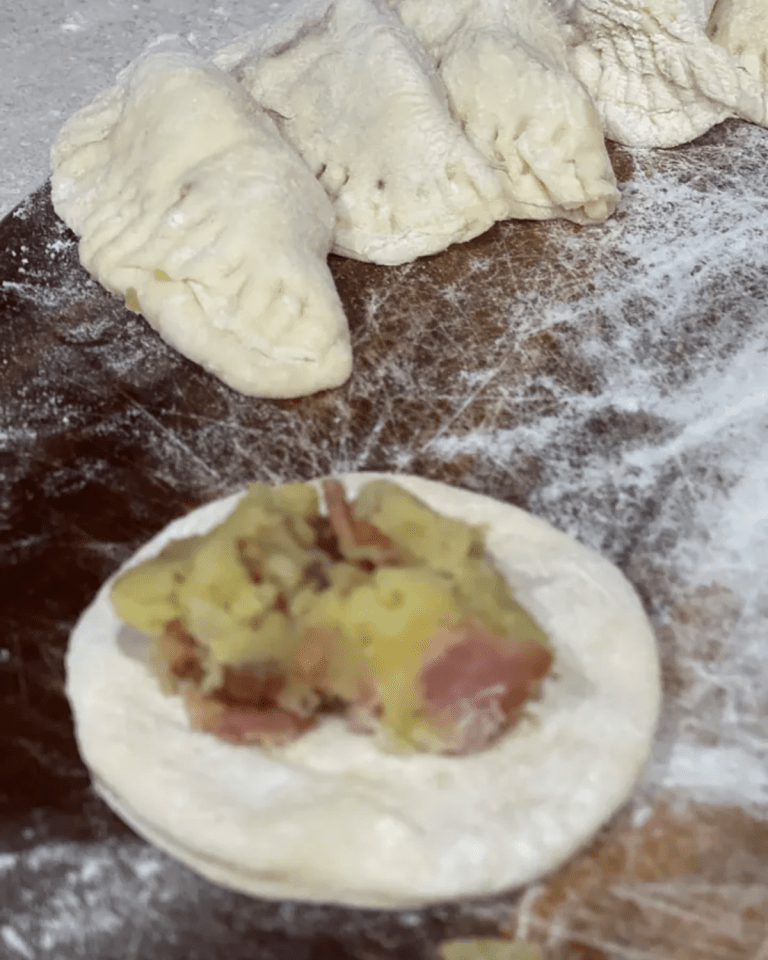
Fold the dough over the filling to form a half-moon shape.
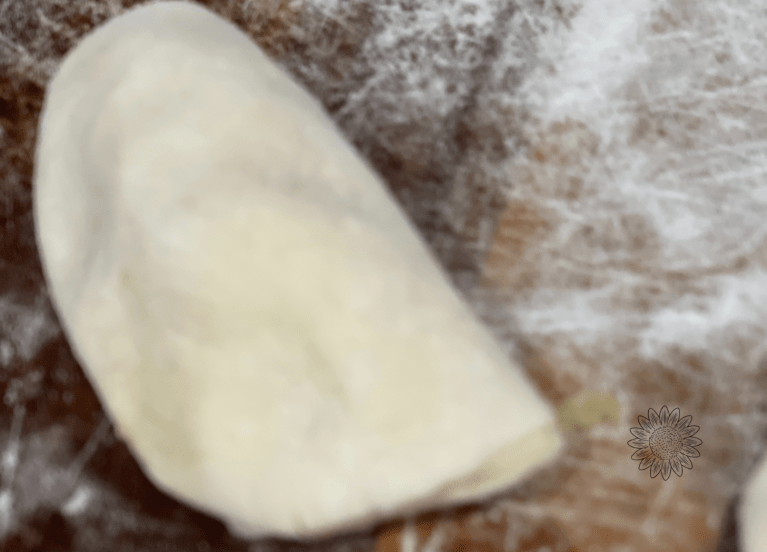
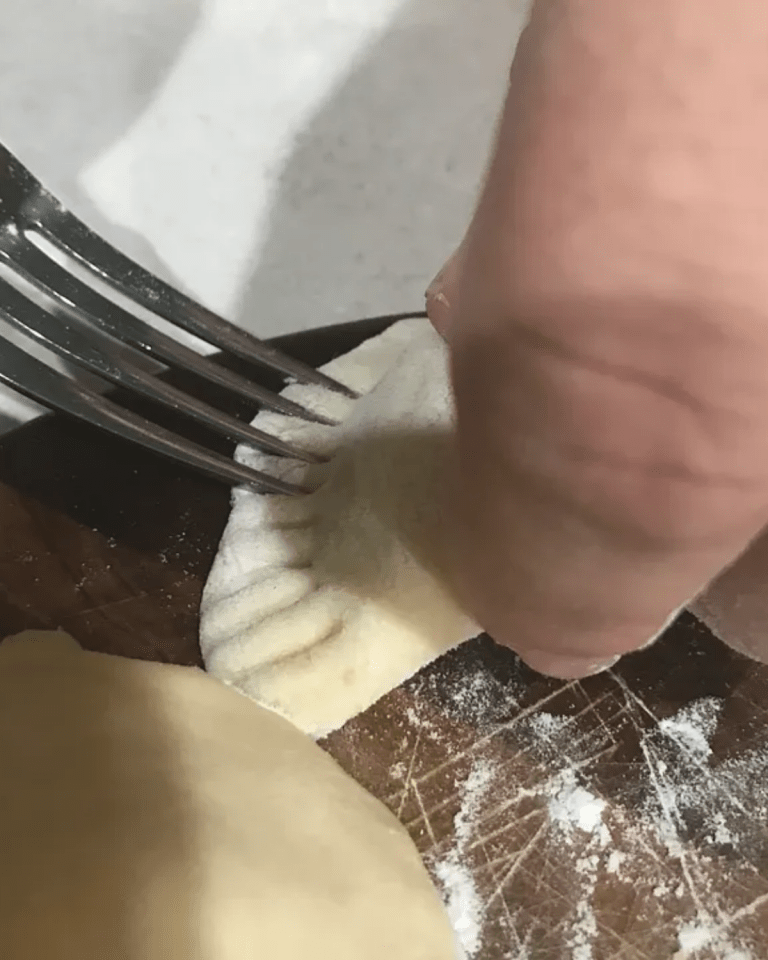
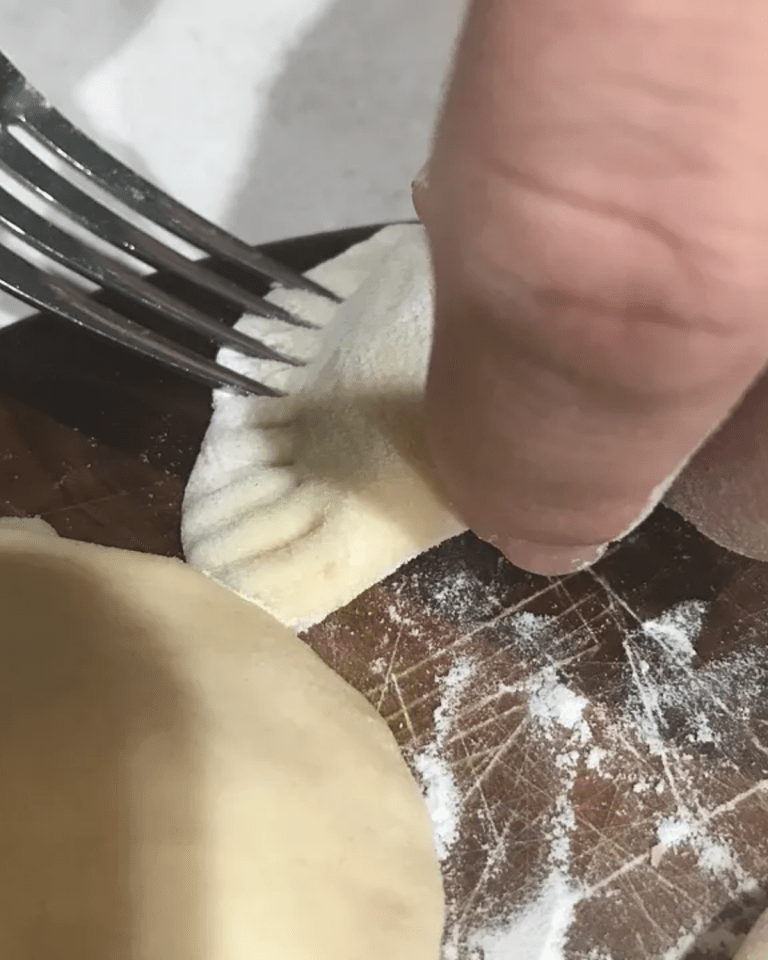
Pinch the edges firmly to seal the pierogi.
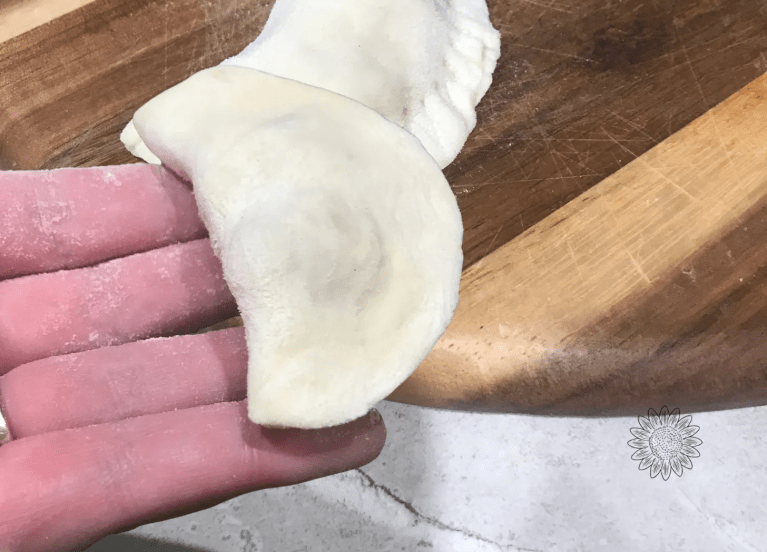
Use a fork to crimp the edges, flip over and use fork to crimp edges again.
Cook the Pierogi
Prepare a casserole dish with lid by buttering the bottom to prevent pierogis from sticking. (ahhhh no picture!)
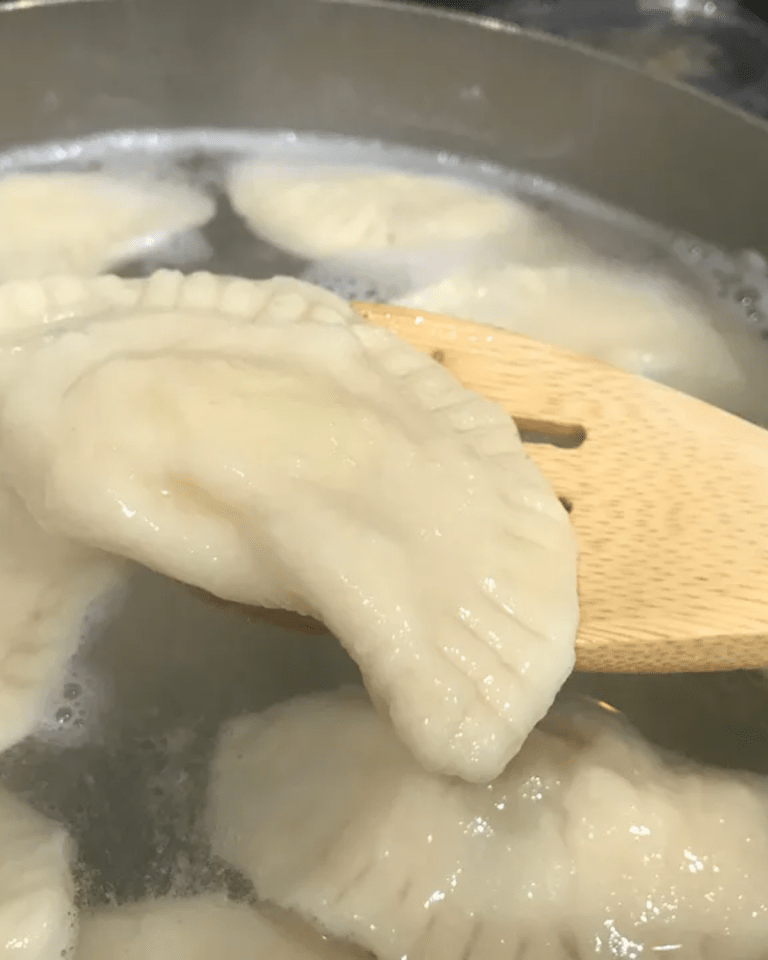
Bring a large pot of salted water to a gentle boil.
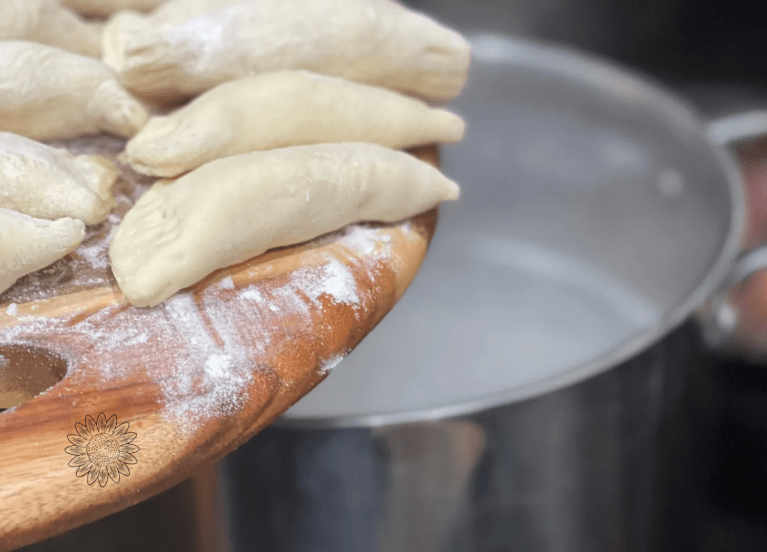
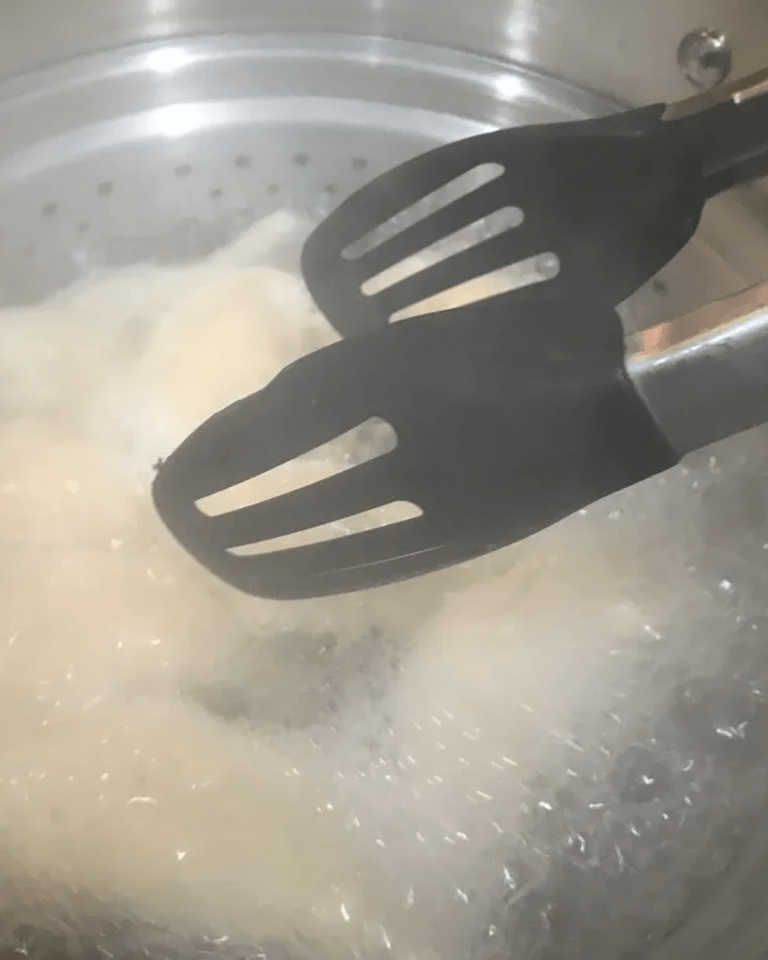
Drop the pierogi into the water in small batches. Cook until the pierogi floats to the surface, approximately 3 to 4 minutes.
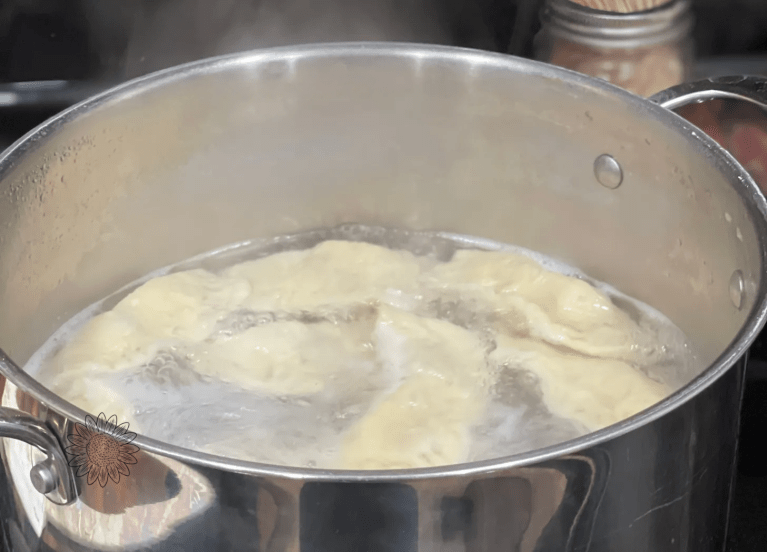
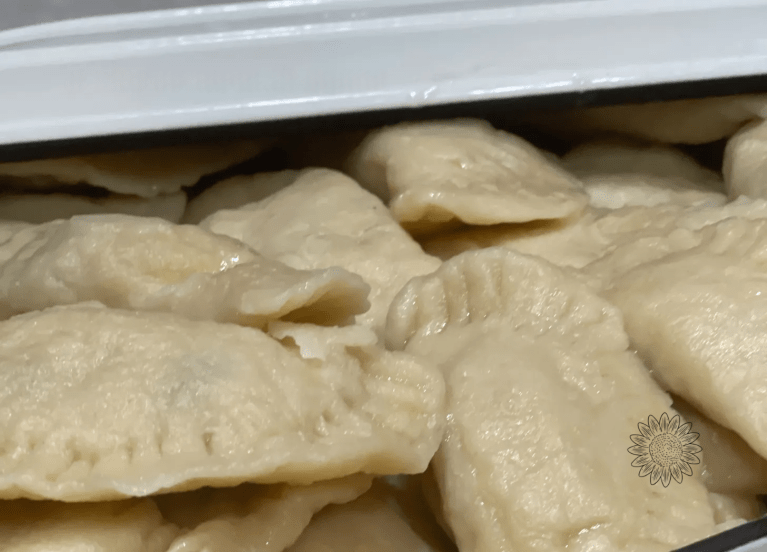
Remove the cooked pierogi with a slotted spoon or tongs and place in prepared casserole dish with lid.
For each batch I cook, I add some butter to them in the dish to prevent them from sticking.

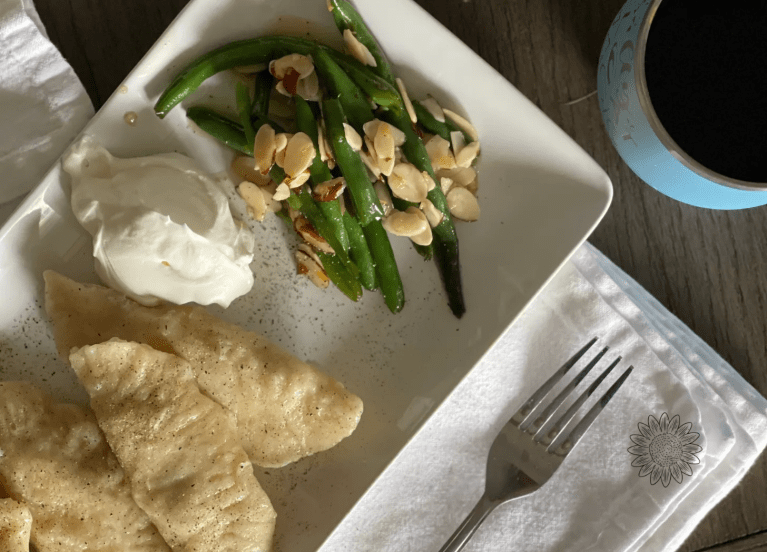
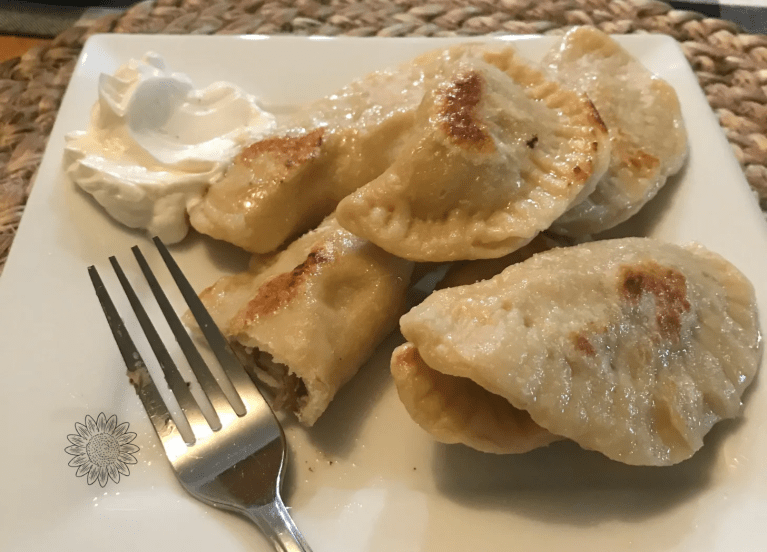
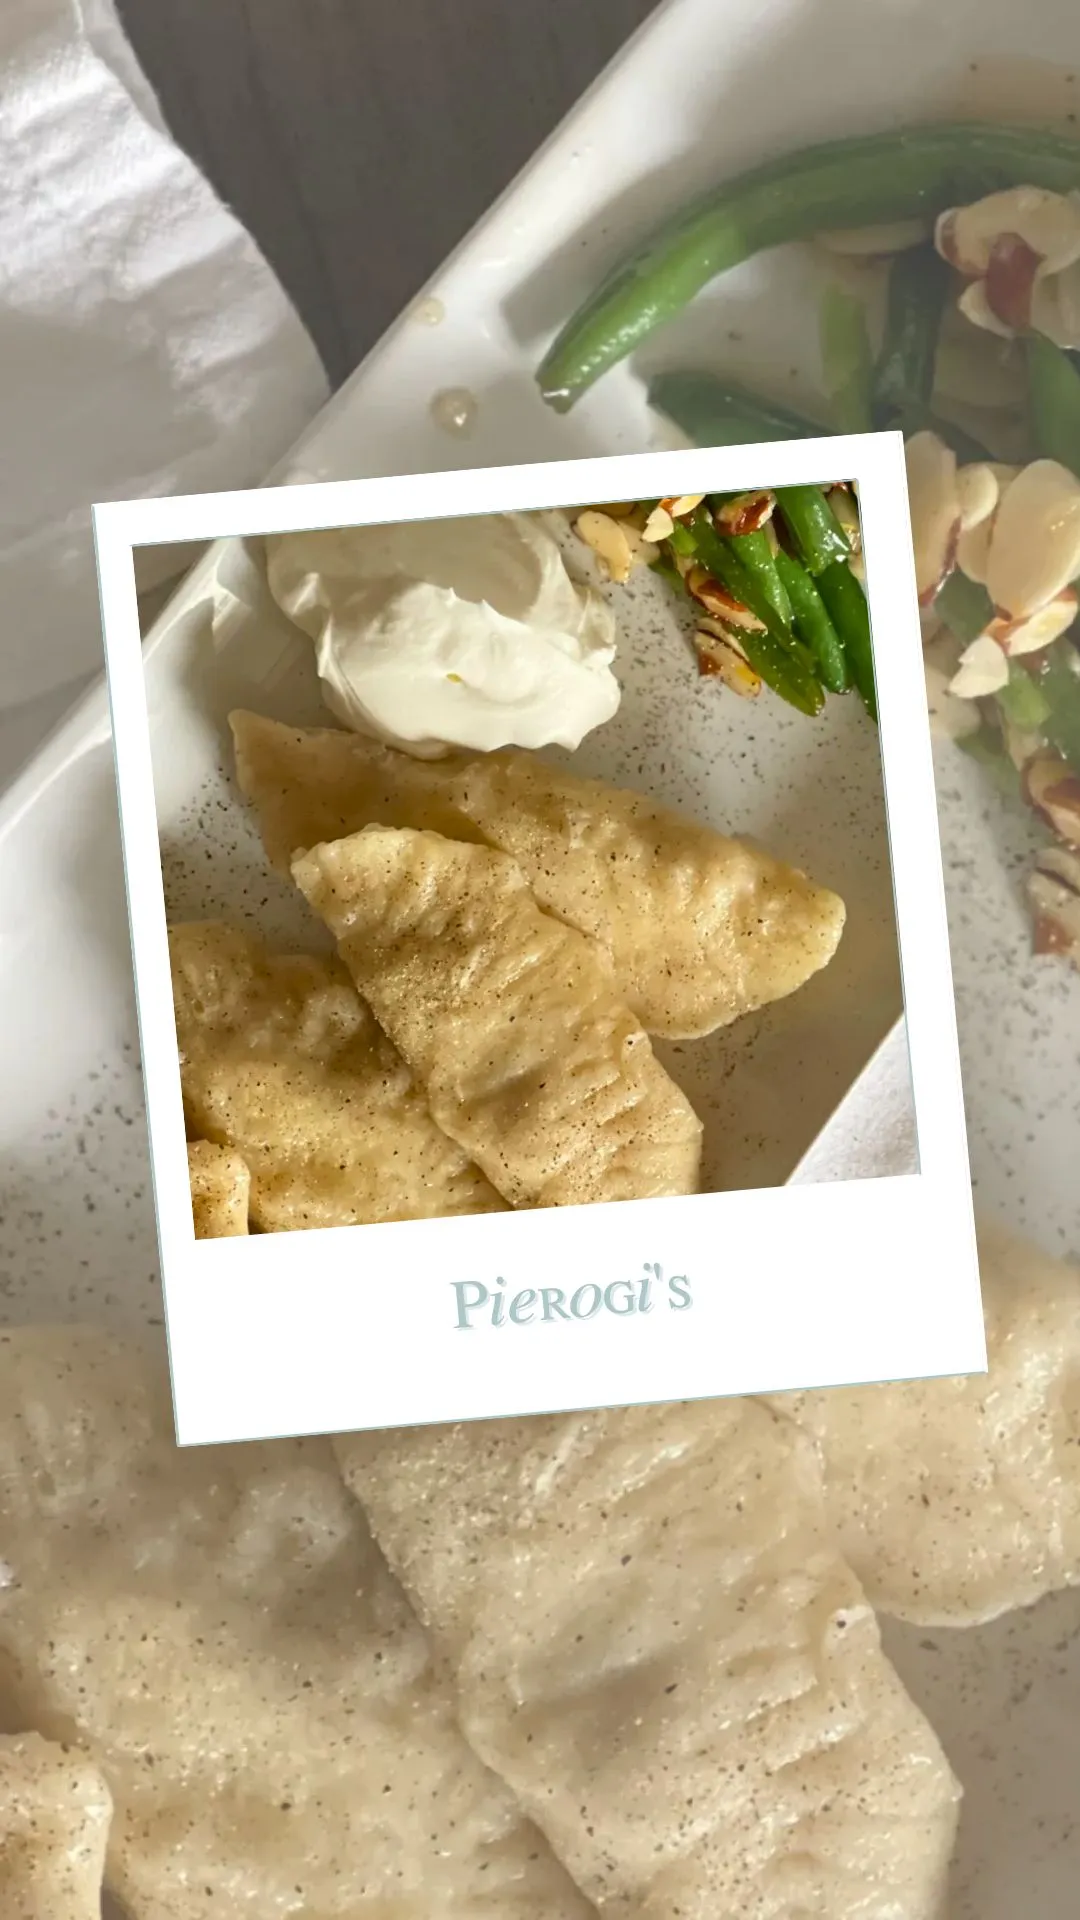
Serve the pierogis with the reserved sautéed onions and extra sour cream.
Reheat Pierogi
Boiling Method
Reheating pierogi by boiling is a simple and effective method that preserves their original texture and flavor. Whether they’re freshly cooked or frozen, this traditional approach ensures your pierogi are warmed evenly and taste just as delicious as the first time.
- Fill a large pot with water about three-quarters full, add a generous pinch of salt for flavor, and bring it to a rolling boil.
- Gently add three or four pierogi to the boiling water using a slotted spoon or skimmer, ensuring not to overcrowd the pot.
- Wait for the pierogi to float to the surface, then continue boiling for an additional 90 seconds to ensure they are thoroughly heated.
- Remove the pierogi carefully with the slotted spoon, allowing any excess water to drain, and place them on a serving dish to avoid sogginess.
- Repeat the process for the remaining pierogi, making sure the water is boiling before adding each new batch.
Frying Method
Here’s a simple step-by-step guide to perfect pan-fried pierogi:
Serve Immediately. Once they’re crispy and heated through, remove the pierogi from the pan and serve them hot. Pair them with your favorite toppings, such as sour cream or sautéed onions.
Heat Your Pan. Start by heating a frying pan over medium heat. A non-stick pan works well, but a regular pan will do the trick with a little butter or oil to prevent sticking.
Prepare the Pierogi. Add a small amount of butter or oil to the heated pan. Arrange the pierogi in a single layer, ensuring they don’t overlap. Overcrowding the pan can prevent them from frying evenly.
Pan Fry to Perfection. Cook the pierogi for 3–4 minutes on each side until they turn a golden brown and develop a crispy exterior. Adjust the heat if necessary to avoid burning.
For me, pierogis are so much more than food; they are love, shaped by dough and filling. Each bite carries whispers of my grandmother’s wisdom and echoes of my dad’s cherished traditions. They remind me that home is not a fixed place but the warmth we create and the connections we nurture. Making pierogis has shown me that traditions can evolve while still holding onto their heart. Whether you’re crafting hundreds for a large family gathering or just enough for a quiet dinner, the act of making them brings people together.
What traditions or recipes connect you to your family’s history? Have you ever adapted a cherished tradition to fit a new chapter of your life? I’d love to hear your story.
Gracefully yours,

Pin Me
Help keep the words flowing and the stories brewing.
Buy Me a Coffee

Leave a comment